Showing posts with label tutorial. Show all posts

Sunday, October 18, 2015

Shhh...Making Pin Weaving Bracelets

Way back when I began my journey into art quilting I took a class with David Walker --- he is amazing, and I give him credit for my stashes of yarn(no I'm not a knitter) and beads. It was David that introduced me to couching and adding beads to a quilt. Thank you David!

But, if one is not a knitter and has a larger stash of fun, colorful yarns or if you are a knitter with bits and pieces left over from your projects, then you may want to give these pin woven bracelets a try.....then if you're looking for special embellishments for finishing opportunities join me on November 6th for my Fabric'ating Embellishment on-line workshop.

BE WARNED -- ADDICTION IS A STRONG POSSIBILITY

Here I have made a small loom from a 10" x 3 piece of foam core board; marked 1/2" top and bottom; then cuts made ever 3/8" to hold yarn
   
Then tape yarn down in the back and wrap the loom, back to front
 
 Here the loom ready to go
 Next, select your weaving yarns and thread up your needle with a yard or 2 so you're ready to weave.
 Now, using the needle go in and out of the loaded yarns.
 Pull the yarn through, and leaving about a 3-4" tail just keep going.
 When you run out or want to change yarn just remember to leave yourself a tail...
 And, keep weaving until you get it as long you want it to be.
To begin finishing process - cut the loom strings on the back,
 and two at a time bring them forward, pulling them out of the cardboard, and tie a knot
When ends are all knotted take the loose yarns individually and rethread them onto the needle...
 weave these back into the bracelet...
 then snip them off.
This will leave you ready to finish them off with beads, buttons for closures, almost anything could be used!

If you want to learn about some fun finishes you'll want to join me for my upcoming Fabric'ating Embellishments on-line workshop. It is scheduled to begin on November 6th. Giving you plenty of time to get started, and plenty of time to finish up some for holiday gifts!

I'm working on finishing mine up for some special friends.
Hope you give these a try.

Weaving On,
~Rose


Monday, December 22, 2014

Quick X-mas Tree Tutorial

With just a few days left before Christmas I thought I would share this quick to make Fast-Piece Applique Xmas Tree Landscape.
It is 11"x14", easy to stitch together and to make them go together even faster I had shopped for some ornaments that they have at the stores for miniature trees. These I glued into place. So in an afternoon I was able to finish 3 very easily.

These are my three:


I am including here a pattern for the little quilt and a piece sequence that you can follow to piece it together using Fast-Piece Applique. If you have never tried this technique I would suggest you watch my YouTube video, for it give you a full description of the process. Then come back here:

Copy & enlarge the pattern below for 11x14.


Following the stitch guide here, piece it together;
remembering to trim as you go,
Stitch pieces 3 to 7; 5 to 6; 8 to 9 and 10 to 11.
The stitch 3/7 to 1; 5/6 to 2.
Then stitch 3/7/1 to 4, and 5/6/2 to 8/9.
Stitch these sections to each other, and
Lastly, stitch 10/11 into place.

With the top done I used basting spray and made a quilt sandwich.
I then couched all the lines with yarn and metallic thread.

Then I placed the embellishments in place and using a chopstick I glued them into place.
This small pattern is a great way to try out Fast-Piece Applique.
I hope you enjoy it & have a wonderful holiday season!

Happy Stitching
~Rose


Sunday, June 29, 2014

Flower Power - Tutorial & Give-Away

Happy Sunday!
Today I am passing along my Flower Power tutorial, 
then tomorrow I'll post how you can win
a fun packet of Hoffman Crackers to make lots of flowers.

Time to get our quilts a'bloomin just like our gardens:

Stuff needed:
2- 12 1/2” pieces for background and backing
1- 12 1/2" piece of lightweight batting
6- 6” squares for larger flower parts
6- 4” squares for smaller flower parts
3- 3” squares for button covered centers
Light weight fusible for leaves – (HeatnBond Lite)
Heavy weight fusible for flowers– (HeatnBond Ultra)
Dritz button maker


  • Enlarge the patterns for the flower parts and leaf.


For Leaves:
  • Take the fabric for the leaves and press the light weight fusible to the wrong side.
  • Pin the leaf pattern in place and cut 4 leaves.
  • Align these on your background fabric; remove backing papers and press in place.

Once in place I layered my quilt sandwich; stitched around each of the leaves and embellished the background.

For Flowers:
  • Take 3 of the larger flower part fabrics and press the heavy weight fusible to the wrong side of each.
  • Let cool. Remove papers and press the remaining larger flower part fabrics right side up to each.
  • Pin the large leaf pattern in place and cut 3 petals; cutting along the line towards the center.


Repeat this process for the smaller petals.
Stitch & embellish the petals while they are flat.
Once complete pull in each of the rounded edges so the slightly overlap and tack each in place with a couple of stitches.

Flower Centers:
  • I used fabric and a button maker to create the centers for my flowers.
  • Each started by marking the center with a chalk circle that I filled with French Knots.
    Then I used the button maker, making sure that the knotted area remained centered.

Lastly, I layered each of the flowers and stitched them in place on the quilt and added the binding.


Don't forget to check back tomorrow
Get in on a chance to win an amazing packet of
40- 10" x 10" Hoffman California batik fabrics!


Saturday, March 1, 2014

Ravens Flying Off

Have you ever had a quilting buddy, or two or more help you out in a way there just doesn't seem to be the words to say?

Well, I consider myself amazingly fortunate to have some of those (really many) of those folks around me.
After all, quilters are the BEST!

There were four amazing woman who went over and above recently, and I have thought and thought about the right thank you. I thought about many things, but in the end decided to share my wealth with each of them by sending them one of the 5 ravens that have been keeping me company for a while. A bit of my studio to theirs.

A couple of these showed up along with instructions on how to make them in the May-13 Issue of GenerationQ Magazine.-and you can click over a get the free pattern. But the others were made just for the love of it.

These are the ravens that took flight yesterday and will make it to their new homes by Monday.

The packaging of each gave me time to say good-bye.

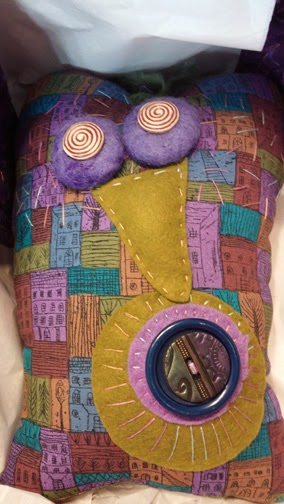
BUT, the one that remains is pretty upset. He seems to be staring at me with his googly-woolly eyes and saying... "What the???!#!"
He'll get over it -- I'm sure!

Have you ever made a special thank you for a dear friend (quilter or not)?
I'd love to hear the what and when?


Happiest of Saturdays
~Rose
Saturday, February 22, 2014

Turning Up Poppies

Well, maybe not turning up poppies, but today I'll be sharing how I created the turned-fabric poppies for my entry into the Cedarhurst Center of the Arts, Creativity Redefined exhibit.

Yesterday the sun came out and it promised to be a glorious day, so Dave & I decided to take a drive to pick up my 12 x12 piece from Cedarhurst. The exhibit was wonderful.

The completed piece is pictured below, and is actually 3 layers. The first is the base quilted piece. The second is also a quilted piece but this one was wrapped around foam core board before it was mounted on the base. Lastly, the poppies were stitched separately then attached to the foam core mounted quilt.

The poppies started with the fabric -- here I chose some red silk and applied some iron-on lightweight interfacing. (I have been using the HeatnBond Featherweight fusible interfacing).

With a pattern cut out of paper I cut and stacked:
1 - square of light weight batting
2 - squares of the prepared red fabric right sides together
lastly, I pinned the pattern in place


Next, at the sewing machine I stitched all the way around the edge of the paper pattern.

Once stitched, remove the paper.
trim along the edge of the circle; then clip the curves every 1/4"
Now, carefully cut a short slit in the top fabric about 1" long, and turn the circle right-side out.

With the circles made, go back to the sewing machine and using decorative thread stitch up some fun. ( a bead or two works great too)


lastly, attach them where ever they will make happy!

It's another sunny day here in Kentucky so I'm off to get out and enjoy the day...
YOU TOO!

Monday, December 9, 2013

Scrappy Trees

Happy MONDAY!
Being snowed in has had it's good points and it's bad points....
on the good side is plenty of time to stitch...
on the bad side...a bit of cabin fever.

I am in the middle of a ton of quilt projects for my newest books, and this weekend I was stitching some fun -- wonderful colors -- of fabric. Once the top was done I had a pile of scraps that screamed stitch me into something for Christmas...

so, inspired by a fabric tree given to me many years ago by my friend Joanell I started stitching those scraps together. A bit of improvisational stitching... then pressing... then cutting & stitching... cutting & stitching, and finally some cutting my newly stitched fabrics into as many triangles as I could.

So, with any luck I will be able to get out today and pick up some pillow stuffing and dowels to finish these up.... 'til then, here's some pictures I took along the way.


Sunday, August 25, 2013

Adrift in a Sea of Glass - Garden totem tutorial

Back in June I took a short 3 hour workshop from
Val Pollard at Ephemera Paducah.


It was called Garden Totems, and since (having just moved in to a house with an established garden) there was not really going to be any planting this year I thought why not!?! Well, just like that 3-hour tour they took on Gilligan's Island, I found myself in a sea of glass -- for I was hooked.

The process starts by finding no longer loved glassware and dishes, gathering some basic supplies and casting off. The dishes can almost be any kind, but a couple of things to keep in mind when prowling through yardsales and thrift stores:

you need glass & ceramic things of various sizes
colored glass is wonderful,
but don't discount all that cut clear glass

having a flat surface is easier than a carved surface
plates work great to help between sections
and don't forget all those fun finds for toppers

Once you've got your own sea of glass you'll want to wash everything up before using.
Then get some rubbing alcohol and clear silicone(graded for outdoor use) and you're ready to go.

Playing with how things will stack is the next order of business, but once you start gluing you'll want to glue pairs together -- then the pairs -- then the sections. I like to give a couple of hours between section gluing.

Things to keep in mind as you glue:
put enough of the silicone around the edge to form a seal
and plates up will gather and hold water vs plates down will whisk water away


Here are some photos of a couple of my totems in process, followed by some fun toppers:


Be warned -- it can be addictive!
Enjoy.... and send big thanks to Val for letting me share.

Back to Stitching
~Rose